Editorial Note: Matt is a Senior Scientist at Pandora and was one of the attendees at last year’s WiMIR workshop. In this post, he shares his experience and one of the demos that came out of the workshop.
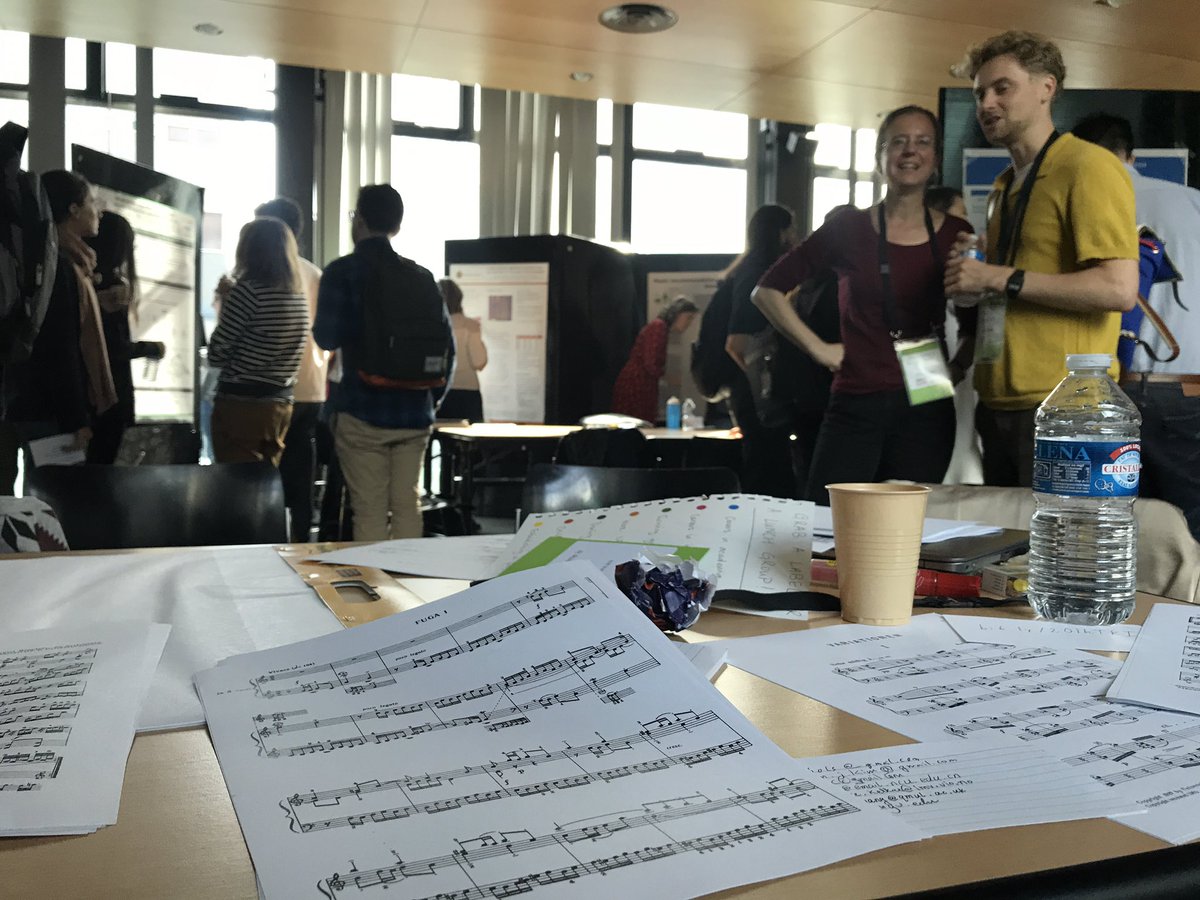
This year following the conference of the International Society of Music Information Retrieval, over 70 people attended the inaugural WiMIR Workshop. It was a fantastic event to wrap up a week of non-stop music, math and machine learning. It was great to see a lot of familiar and unfamiliar faces with a wide variety of experience, and we were particularly impressed with the organisation. The day involved a quality poster session containing 18 posters from women researchers in the field, discussion groups over lunch, and workshop groups with enough time to have an in-depth, productive and insightful conversation.
Benedikte Wallace, Gabriel Meseguer-Brocal, Jan Van Balen, Karin Dressler, Matt McCallum, and Amy Hung formed the group “Building Collaborations Among Artists, Coders and Machine Learning” led by Douglas Eck. The focus of this workshop group was to explore building bridges between machine learning researchers, developers and artists by building communities and discussing the technical hurdles that must be overcome in constructing bridges between these different areas of expertise. These technical hurdles might include UX design, open source development practices, and meaningful research directions.
Building Bridges
Everyone speaks a different language. Some dialects are very distinct, for example, people that come from different geographical regions often do not understand a single word of each others’ language. Even people who spend their day doing a different activity can speak a slightly different language, perhaps within the same industry. For example, one of the team was recently reading comments in code that was describing the functionality of a Fourier transform library—the code that separates audio into its constituent frequencies, i.e., the pitch and timbre we hear. The comments said that the input and output “may alias” or “may not alias”. To a digital signal processing engineer this might mean that the frequency content in the audio may or may not be above a given frequency referred to as Nyquist frequency, although, to a software developer this might mean that the input and output must be held in different memory locations. There is a wide variety of language differences within any given city, company or social group, and many connections/differences like these in between them. They often lead to misunderstandings, creativity, new perspectives and learning.
/*
  Similar to pffft_transform, but makes sure that the output is
  ordered as expected (interleaved complex numbers).  This is
  similar to calling pffft_transform and then pffft_zreorder.

  input and output may alias.
*/
void pffft_transform_ordered(PFFFT_Setup *setup,
                             const float *input
                             float *output,
                             float *work,
                             pffft_direction_t direction);
One interesting case of “Building Bridges” is between consumers and creators of music. What consumers do with music and what creators do with music is typically quite distinct. Consuming music is usually passive unlike music creation. With modern technology and machine learning, music experiences for consumers can become more interactive with the aid of a machine. Several Magenta projects have already demonstrated this in some ways. For example, Piano Genie showed that people could play a piano with the aid of a machine which has learned from a large corpus of piano pieces, while Latent Loops helped people create new melodies by combining pre-existing ones. Both of these applications take input from creators, and allow a much broader audience to experiment with them. As consumers, one of the most enjoyable or fulfilling components of music might be the ability to empathise with the lyrics, mood, or overall narrative of a piece. Allowing consumers to interact with the art that an artist creates, in a way, brings them closer together and can make the experience even more personal.
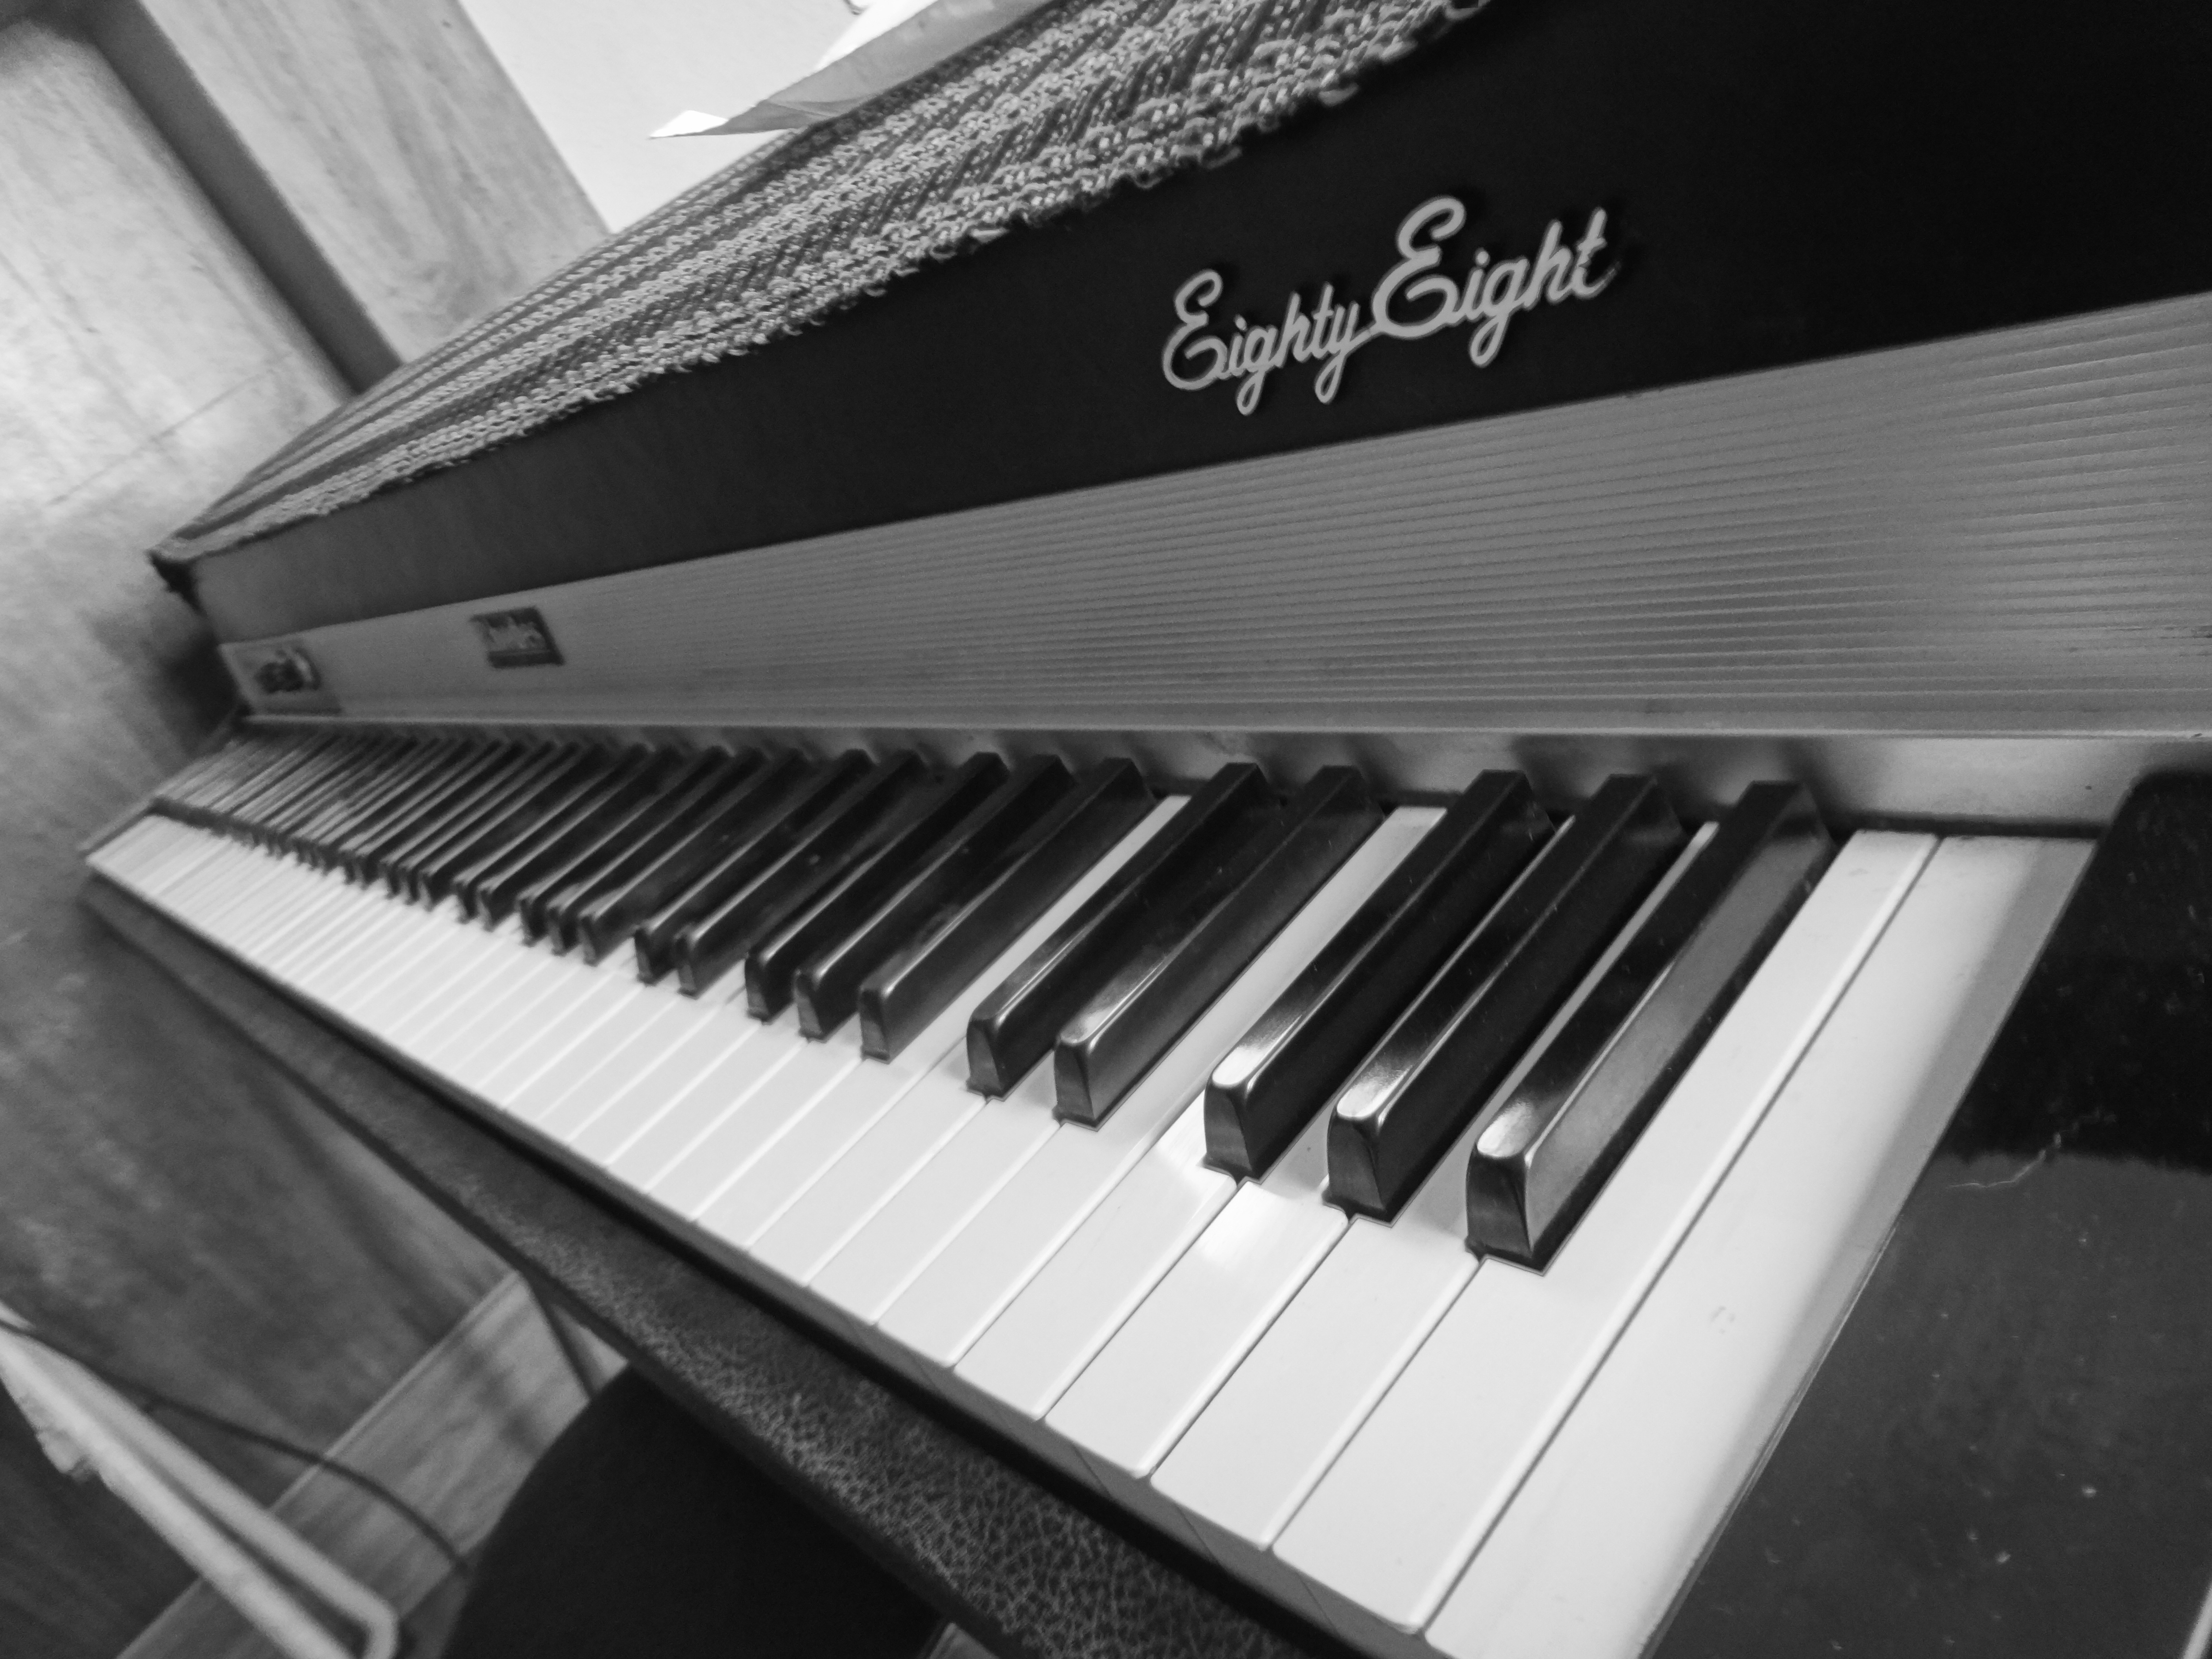
In addition to building bridges between artists and consumers, these tools may be just as useful in the creative process, allowing artists to churn through ideas in quick succession for inspiration, automate parts of their workflow that they might find restrictive or laborious, or even as a past-time when they are not hard at work. Artists who produce enough content may be able to train these models on their own data, or tailor them towards it. In a way, they could be influencing the machine that, in using it, may later influence them. The influences machines have had on the sound of music goes back centuries. As an example, in more recent times, the sound pioneered by the Fender Rhodes piano in 1965 is still popular in modern music. It now forms a sound that has impacted many creators and consumers across a range of genres to this very day:
Fender Rhodes recording from tim.kahn on FreeSound
A major difference in modern times, enabled by machine learning, is that software can now be influenced by artists much more easily, i.e., by manipulating the data that it learns from. This is a much more fluent and bidirectional relationship than was possible previously. This is where the bridges between researchers, developers and artists become very important. These are groups of people who typically speak very different technical languages. Although of course, there are a number of people who might fit into all three categories, often great engineers are not experienced musicians or vice versa, and they have a different understanding of potentially the same application. A developer may be concerned about a number of unforeseen technical issues that are required to make an application work, such as clock synchronization across multiple devices and the latency this might introduce in a real-time system such as a musical instrument. An artist may be concerned about the accessibility of a musical interface, and how this may enable a more fluent creative process. Finally, a researcher may be able to apply statistical models in novel ways that assist the two other groups, perhaps by creating novel sounds, or automatically generating melodies / accompaniments.
Despite these different perspectives, in the context of a project like Magenta, these groups of people share a common broad objective—to enable and enhance the creative process. Bringing together groups of people with such diverse skill sets, perspectives and understandings might increase the likelihood of novel and useful solutions, bringing ideas to the forefront that each of the groups might not have otherwise known is important or even possible. It’s pretty exciting, but people might have to work harder to learn each other’s perspectives or communicate their perspective more clearly.
Brainstorming
Many of us in the WiMIR group were researchers and developers with several who also play musical instruments, and it was an interesting point of discussion to talk about not the human language that we communicate in, but the computer language. In this type of project it’s particularly important to have something that is very accessible (both in terms of learning curve, and distribution) yet is powerful enough to be useful in the diverse set of problems encountered in the field of music information retrieval. This really highlights JavaScript as an excellent tool, and after thinking about it, it’s clear why this is important to the Magenta team. While the technical aspects of JavaScript can go deep, even knowledge of the basics can be very powerful. It has a huge community, and applications you create with it can be distributed very easily via the web. There are also a lot of tools that allow you to program JavaScript collaboratively in a browser and see live updates of the results. Furthermore, for audio and music, there has been a lot of JavaScript developments in the WebAudio project that allow very quick prototyping of fundamental blocks in audio processing graphs, which is an incredibly useful tool in prototyping audio applications quickly. For example, a very basic synthesizer can be written in just a few lines of code:
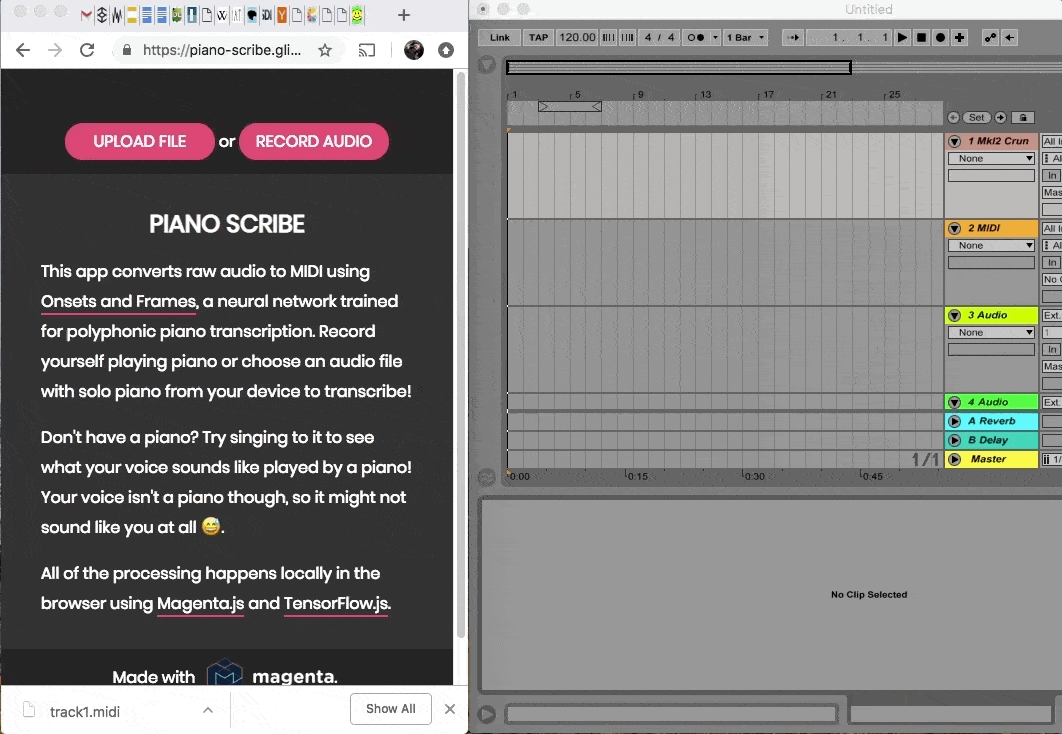
All things considered, we wanted to create something as a workshop group, and Magenta’s deep learning models and JavaScript interface made this possible in the limited time span we had. Several of us had seen a Google paper “Onsets and Frames: Dual-Objective Piano Transcription” earlier that week at the ISMIR conference, and it was clear this solved a difficult problem that is highly desirable to automate in a number of creative projects. It translates a piano performance into a MIDI representation, significantly simplifying the interface between a traditional instrument such as the piano and modern audio software. It was important that anything we created had a simple interface, and this research played a big part in achieving that. See how easy it is to use this to transcribe a piano recording to MIDI in your favorite digital audio workstation:
Another recurring theme that came up throughout the workshop discussion was how important it was not to limit an artist’s creativity. Despite maintaining a simple interface, we didn’t want to constrain the user’s level of control. This is always a challenging balance in music technology. An easy way to add control, is to give people more knobs and buttons, but this increases complexity and, in a way, can take away control by interrupting an artist’s workflow, or perhaps it will require a lot more experience or training with the instrument or device to use it effectively.
To expand on the “Onsets and Frames” Magenta application, and maintain a simple interface, there was a lot of discussion about a looping application. This is a good way to provide the musical feature of repetition while focussing on a small snippet of music. Integrating the technology of Onsets and Frames allows creative input in a very general way. It essentially takes audio, and makes symbolic music—you could think of it as speech-to-text for music. The machine learning models are trained on piano recordings, but that’s not to say that we couldn’t use any audio input and see what the model comes up with. Because the model hasn’t learned with this type of data, its behaviour may be unpredictable in this scenario, but it’s a lot of fun.
In the limited time span of the workshop, it seemed like a big task to create a useful Magenta application right from inception. We were surprised with how far we could get however. Some of us were interested in looking into the Magenta API, while others were able to use the pre-existing applications created by Magenta, to create music directly. By the end of the workshop, all together we had collected a variety of sounds from around Paris, turned them into symbolic representations, and pieced them together in Ableton Live to create a unique sonic experience for a presentation. Here are a few samples that were gathered from Paris on the day:
Birds of Paris
Roadworks of Paris
Sirens of Paris
Trashcans of Paris
Fountains of Paris
Implementing a Web Application with Magenta
During the workshop we were able to use Magneta tools to essentially create a melody that complemented sounds recorded from the real world. With the element of melody, all that remains is to combine it with the musical elements of rhythm and repetition and we would have something that is pretty undeniably music. This is where Magenta’s MusicVAE comes in.
The Magenta team have done a lot of work in encoding latent spaces using the methods of variational autoencoders. You might think of this type of system as consisting of an encoder and a decoder, that transforms audio to a latent space and back. Specifically, the encoder is a non-linear transformation from the space of piano roll style music representations, to an abstract latent space defining a high dimensional Gaussian distribution. The decoder performes a second nonlinear transform from points that are sampled from this Gaussian distribution, back to the space of piano roll style music representations.
The encoder and decoder could be one of many neural network architectures. In the case of the MusicVAE model, Magenta used recurrent LSTM networks. More details on MusicVAE models and variational autoencoders can be found in this paper, and the references therein. The encoder and decoder are trained jointly. Once they have been trained, one possible use for the network may be to throw away the encoder, and simply sample from the latent Gaussian distribution and use the decoder to generate music. This is not just any music. If trained well, this music will have many of the properties of the data it was trained on. It will sound like actual music, as opposed to someone mashing a keyboard or drum machine with their fists. Furthermore, it may not correspond exactly to any of the points in the training dataset, it can produce a completely novel sequence that retains musical properties.
A comparison between MusicVAE to a naïve random drum pattern generator can be seen in the figure below for combinations of 9 drum / percussion types across 32 beats:

We can see here that if we randomly select whether each sample is “on” or “off” with equal probability, we get very different behaviour than sampling from the MusicVAE model. It appears that MusicVAE prefers to put drum hits on even beats, or particularly, multiples of four, but it can still improvise outside of this behaviour. It also tends to put a lot of hits on the sample at index 5, the hi-hat. These are all musically typical behaviours. For the application in this blog post this is exactly what we need. A model that takes a random input and generates musically meaningful output. If done well, this can provide a never ending source of drum patterns. Think of it as a session drummer with just one command, “Hey Bonham, mix it up”.
Together with Onsets and Frames, these are the major technical blocks we need, we have a fairly free-form source of creative input—recorded audio—and an unlimited rhythm producer. All that remains is to throw these two elements together into a JavaScript application with a simple interface and an audio engine that allows synchronization and looping of these elements. Without any further knowledge, this sounds like it could be quite an undertaking depending on how well abstracted these components already are. None of us are front-end web developers, but have fortunately worked on enough research demos, small websites, and hackathon projects to know how quickly these things can be pulled together. A few of the obvious components that make this possible are:
- WebAudio - An API supported by just about all modern web browsers allowing quick plug-and-play construction of a functioning audio graph, consisting of many common fundamental audio signal processing blocks.
- React - A versatile UX JavaScript library that allows you to seamlessly integrate JavaScript state into rendered HTML, handling much of the work in updating state and re-rendering.
- Magenta.js - The JavaScript interface to the Magenta project that allows you to load machine learning models for inference and even compute using your GPU.
If you’re an experienced web developer who works with audio, it’s likely you’ve worked with all three of these components. WebAudio and React are fairly fundamental tools for a web developer, and Magenta.js provides all the machine learning power needed to make really cool music web applications straight out of the box.
With a brief look into the Magenta API, largely thanks to this excellent tutorial, it was clear there were a few components required to make this application a reality:
- Application startup and loading Magenta models
- Drum-beat generation
- Audio recording
- Audio transcription to MIDI
- Audio playback loop
- Metronome
Project Startup and Loading Magenta
Because React lays the foundations of the application, it’s the first step here. React is often distributed via npm which can be installed here. With npm on your machine, you can install the handy create-react-app bootstrapper by opening a terminal and typing:
npm i -g create-react-app
We can then move on to setting up the application with:
create-react-app found-loops
This will create a React application in a folder named found-loops in the current directory. This does all sorts of handy things like create a git repository, create placeholder HTML, CSS and JavaScript, and provide some handy caching code to speed up revisiting the same page.
We’ll also need magenta which can be installed via:
yarn add @magenta/music
The first and simplest step to get a working Magenta web application is to load a pre-trained model. Let’s start by loading a simple MusicVAE model to generate a drum beat every time you visit the page, and provide the user with loading screen, so that they know it’s coming. If we go to the ./found-loops/src/App.js file that was created by create-react-app and edit it to look like the below, we have done all of the work to do this.
import React, { Component } from 'react';
import logo from './logo.svg';
import './App.css';
import * as mm from '@magenta/music';

class App extends Component {
///
/// This class encapsulates a drum pattern generator.
///

  constructor(props)
  ///
  /// Here we initialize state variables and load the model.
  ///
  {
    super(props);

    // Bind methods.
    this.handleNewDrums = this.handleNewDrums.bind(this);

    // Initisalize state.
    this.state = {
      loading: true
    };

    // Create drum pattern generator
    this.config_beat = {
      noteHeight: 6,
      pixelsPerTimeStep: 20,  // like a note width
      noteSpacing: 1,
      noteRGB: '8, 41, 64',
      activeNoteRGB: '240, 84, 119',
    };
    this.vae_model = new mm.MusicVAE('https://storage.googleapis.com/magentadata/js/checkpoints/music_vae/drums_2bar_nade_9_q2');
    this.vae_model.initialize()
      .then(() => this.setState({loading: false}))
      .then(() => this.handleNewDrums());
  }

  handleNewDrums()
  ///
  /// This function is to be called every time we get a new
  /// drum pattern. It creates a new visualizer and loads the
  /// drum samples into it.
  ///
  {
    return new Promise((resolve, reject) => {
      this.vae_model.sample(1)
        .then((samples) => {
        var drum_samples = samples[0];
        var viz_vae = new mm.PianoRollCanvasVisualizer(drum_samples, document.getElementById('vaecanvas'), this.config_beat);
        })
        .then(() => resolve());
    });
  }

  render()
  ///
  /// Render the HTML. This provides HTML content, based
  /// on the state in this JavaScript object, to render
  /// in a web browser.
  ///
  {
    return (
      <div className="App">
        <div hidden={!this.state.loading}>
          <header className="App-header">
            <img src={logo} className="App-logo" alt="logo" />
            Loading...
          </header>
        </div>
        <div hidden={this.state.loading}>
          <div className="Beat">
            <canvas id="vaecanvas"></canvas>
          </div>
        </div>
      </div>
    );
  }
}

export default App;
This loads a model trained by the Magenta team that generates two bar drum patterns, the code itself includes several important changes from the boilerplate React code:
- We have imported the Magneta JavaScript library.
- We have added a state variable “
loading” to the state object that is able to indicate whether the application is ready to generate beats. - We have added a constructor that initializes the state, and loads the magenta model.
- We have created a function to generate a drum pattern
handleNewDrums. - We have added an HTML element that simply includes a canvas so that we may display the model.
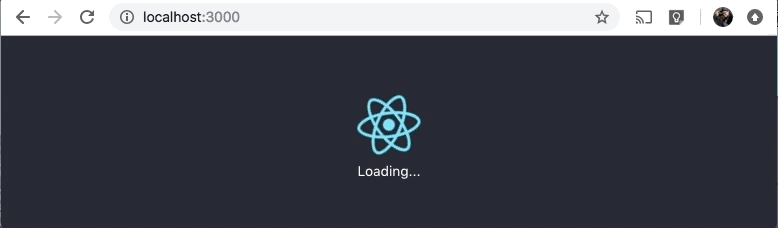
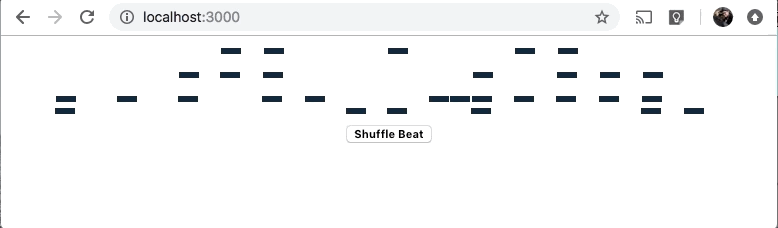
That’s it, we can go to this website, wait for it to load and see a new drum beat in a piano roll representation every time. Try it by typing npm start into the terminal from the found-loops directory. A web browser will open and you will see a loading screen followed by a drum pattern:
Refreshing the page to generate a new drum pattern is not the nicest user experience. We want to allow a user to cycle through drum patterns quickly, so that they may focus on other parts of their workflow without getting interrupted—to keep their creative juices flowing. A simple way to do this is to have a button that creates a new drum pattern for you. One click is probably simple enough not to distract an artist, and will allow them to maintain their focus elsewhere, e.g., on a guitar or keyboard.
Thanks to the React framework, this is unbelievably simple to do. All we have to do is add a button HTML element and tell it which function to call when it’s clicked. We can do this by modifying the Beat HTML div in the render() method like so:
      ...
        <div className="Beat">
          <canvas id="vaecanvas"></canvas>
          <br/>
          <button className="control" onClick={this.handleNewDrums} data-toggle="button"><b>Shuffle Beat</b></button>
        </div>
      ...
Let’s just stop there for a second to appreciate what machine learning has done for us here. Usually to create an arbitrary new drum pattern in a digital audio workstation, an artist has a few options:
- Manually edit the piano roll with potentially hundreds of note additions, deletions, and adjustments.
- Play a drum pattern on a set of pads, electronic drum kit or other controller.
- Select from a finite library of drum patterns a user has saved, purchased or downloaded earlier.
Now there is a new option: Click a button to cycle through an uncountable set of drum patters until you find one you are happy with. This is an excellent option if the drums are currently playing a supporting role in a composition, or as a placeholder until a user is able to pay more detailed attention to this component of a piece. Because the number of new patterns that can be generated is practically infinite, it adds a degree of spontaneity that could spur many great creative ideas. This is much unlike a finite library of one hundred or one thousand patterns which over time could become very familiar and repetitive.
The Playback Loop
It can be frustrating to look at a drum beat MIDI representation and not be able to listen to it! Here we’d like to add the option to loop the drum beat so that we can hear what it might sound like as part of a larger piece. In terms of the interface, this might mean adding a play and stop button. In terms of the logic, we want to start playing back the audio whenever the play button is pressed, and again whenever the audio finishes, until the stop button is presssed.
Without building a sophisticated audio engine in the browser, the Magenta team have provided some handy tools to get this going quickly and with minimal complexity. We can use the Magenta Player object that will do the bulk of the work for audio playback. It’s synchronization of audio with the piano roll display will also allow us to see exactly which midi note corresponds to which sound. We can start by editing the handleNewDrums() method:
handleNewDrums()
///
/// This function is to be called every time we want a new
/// drum pattern. It creates a new visualizer and loads the
/// drum samples into it.
///
{
  return new Promise((resolve, reject) => {
    this.vae_model.sample(1)
      .then((samples) => {
        this.drum_samples = samples[0];
        var viz_vae = new mm.PianoRollCanvasVisualizer(this.drum_samples, document.getElementById('vaecanvas'), this.config_beat);
        this.viz_player_vae = new mm.Player(false, {
          run: (note) => viz_vae.redraw(note),
          stop: () => {
            if(!this.state.stopping){
              this.continuePlaying();
            } else {
              this.stopped();
            }
          }
        });
      })
      .then(() => resolve());
  });
}
Here the Player object is added as a new member variable viz_player_vae. It simply takes a command to run upon playing each note, i.e., redrawing the piano roll display, and a command to run upon finishing, i.e., either start playing again, or stop playing, depending on the object state. Therefore, each time the player completes, it will continue the loop, so the user can hear the continuous two-bar drum pattern. As there may be a small delay in restarting each loop, this is not rock solid audio engine at this stage and will take some extra work for more complex audio playback / synchronization. In practice it is plenty fast enough to hear the drum pattern and even play along with it.
We can see there are some additional methods and state variables included in the code above that we are yet to implement. We have the methods:
continuePlaying(): To play one iteration of the piano roll sequence.stopped(): To handle any actions we want to perform at the end of the last sequence to be played back, once stopped.
We also have the stopping state variable which will be monitored at the end of each loop to halt the playback, based on user input. We might want to adjust the user interface based on whether audio is playing back, so a second state variable playing might be required too. We can add these state variables to the constructor like so:
...
    // Initisalize state.
    this.state = {
      loading: true,
      playing: false,
      stopping: false
    };
...
The functions themselves are pretty straightforward. For continuePlaying() we just have to kick off the Magenta Player object:
...
  continuePlaying()
  ///
  /// Play one iteration of the drum loop.
  ///
  {
    this.viz_player_vae.start(this.drum_samples, 120.0);
  }
...
It takes in a BPM that controls the speed at which the drum pattern plays back as a second argument. We could expose this to the user as another control, but for now we’ll hard-code it at the forever popular BPM of 120.
The stopped() method doesn’t actually need to do anything, but make sure the application state is correct:
...
  stopped()
  ///
  /// Set state when stopping is complete.
  ///
  {
    this.setState({
      playing: false,
      stopping: false
    });
  }
...
It will get called by the Magenta Player object once the final loop is complete. This is really all the mechanics we need to implement drum loop playback with a synchronized piano roll visualization, that’s amazing!
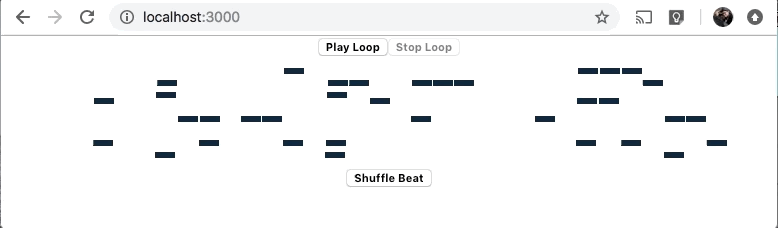
Of course, at this stage the user has no way to control this playback through the interface. Let’s add play and stop buttons to the render() method:
...
      <div className="PlayControls">
        <button className="transport_controls" onClick={this.handlePlay} disabled={this.state.playing} data-toggle="button"><b>Play Loop</b></button>
        <button className="transport_controls" onClick={this.handleStop} disabled={!this.state.playing} data-toggle="button"><b>{this.state.stopping ? "Stopping..." : "Stop Loop"}</b></button>
      </div>
      <div className="Beat">
        <canvas id="vaecanvas"></canvas>
        <br/>
        <button className="control" onClick={this.handleNewDrums} disabled={this.state.recording || this.state.playing} data-toggle="button"><b>Shuffle Beat</b></button>
      </div>
...
There are a few changes here. We have added a new div containing the playback controls. This consists of a play and stop button that are enabled/disabled based on the current playback state. We have also disabled the neural beat generation during playback to keep things simple. These buttons are connected to two class methods we haven’t implemented yet: handlePlay() and handleStop(). We’ve already created the mechanics to do the playback, these methods just define the entry and exit points to the playback loop:
...
  handlePlay()
  ///
  /// Start playback.
  ///
  {
    this.setState({
      playing: true,
      stopping: false
    });
    this.continuePlaying();
  }
...
To stop, we only need to change the state that will be read at the end of the next drum sequence that is played back:
...
  handleStop()
  ///
  /// Stop playback.
  ///
  {
    if(this.state.playing)
    {
      this.setState({stopping: true})
    }
  }
...
That’s it, a complete neural drum machine in your web browser! If you are still running the npm server, and have saved these changes, go back and have a look at your web browser. It should be up to date and ready to roll. You can start the server again at any time by running npm start in the terminal from the found-loops directory.
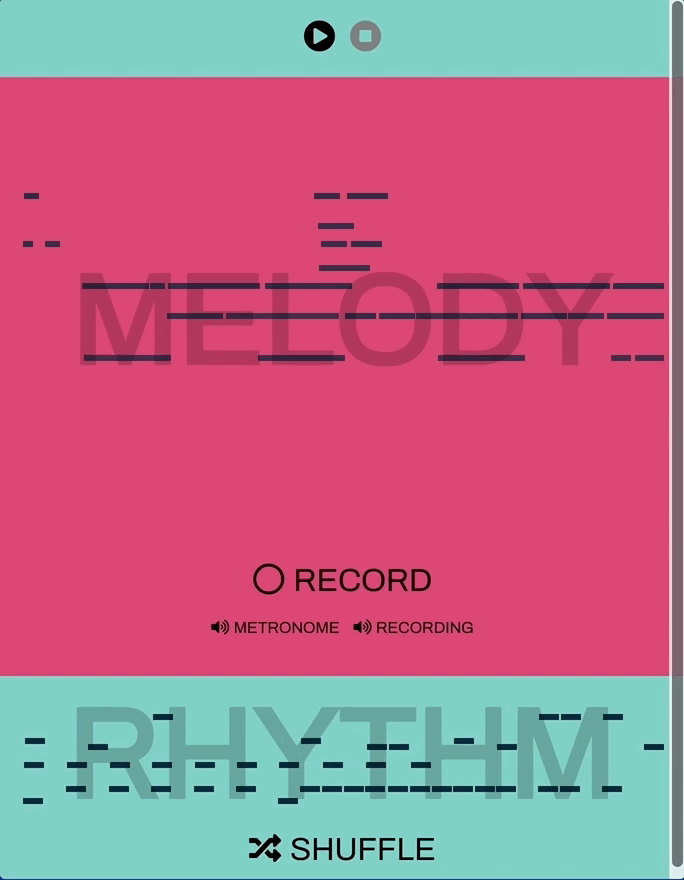
Found Sound Loops
The complete found-loops application takes a little more development, and can be seen here. It was seriously fun to develop, and quick thanks to the tools provided by Magenta. The best thing about music applications is using them, and because it’s a web application, it doesn’t take much to get this into anyone’s hands for their own enjoyment too. The complete codebase can be found here. Altogether, the application provides the neural drumloop functionality built in the tutorial above in addition to the ability to record a two bar audio segment which is then translated into a piano roll representation via the Magenta OnsetsAndFrames object. This allows a little more creative input than a simple button press, in a natural format—it’s simply a recording of whatever the artist chooses.
It’s clear that with tools like this that are provided from the machine learning engineer or scientist to the web developer, and from the web developer to the musician through simple interfaces (be it a JavaScript API or a web application), modern technology is enabling these groups of people to work together closely, and more naturally than before. If these interfaces are simple enough, it’s not too much of a leap for a musician to start building musical web applications, or for a developer to make music. Thanks to machine learning research into artforms such as music; researchers, developers and musicians can each create their own sound and exchange ideas through the medium of the art itself—audio.